This post may contain affiliate links, as an amazon affiliate I earn from qualifying purchases. I only recommend items that I love.
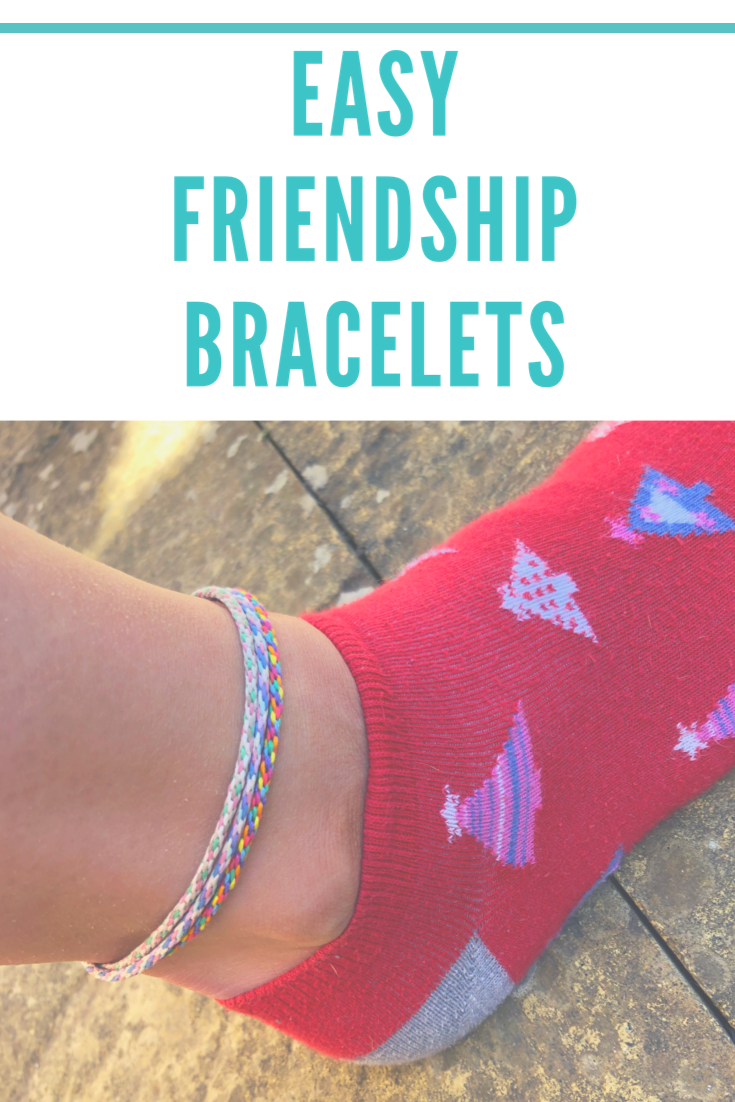
Making friendship bracelets was something I loved to do when I was younger and it always reminds me of summer. So last summer I taught my twins how to make them too, which they then made for all their friends at school and we wore them on our ankles right up until winter, when they didn’t look quite right under tights!
With the weather being so nice recently in the Uk, we have had that summer feeling and the shorts have made their way out of the wardrobe and Friendship bracelet making has commenced.
The friendship bracelets are very easy to make and can even be made by younger children too but I warn you they are a little bit addictive to make.
This is what you are going need to make your own friendship bracelets;
- Cardboard (you can just use an old cereal box)
- Embroidery threads
- Scissors
- A compass or a cup to draw round
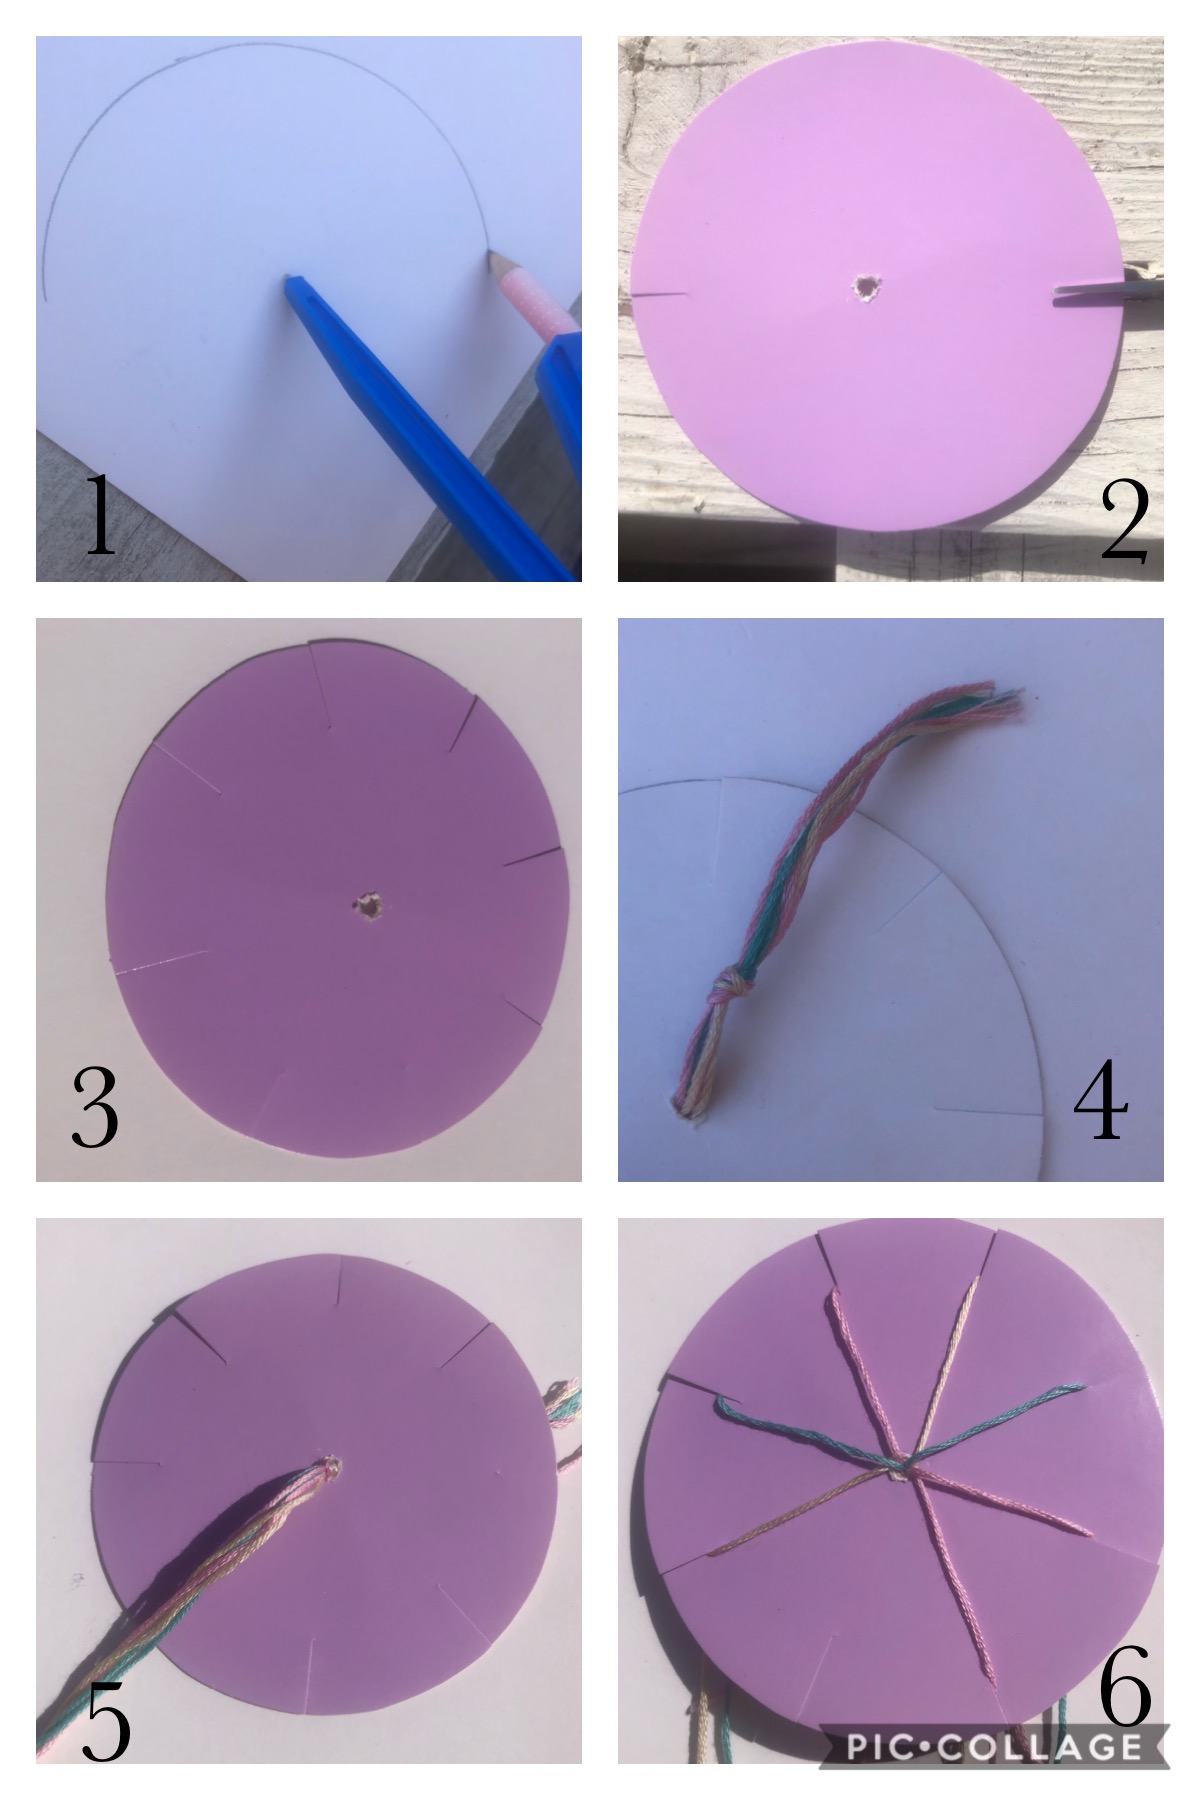
- To start you will need to draw around your cup or use a compass to draw a circle with about a 9.5cm diameter and cut the circle out. See picture 1 below.
- You then need to make 8 slits around the outside of the circle, equal distance apart. I cut slits where the 12, 3, 6 and 9 would be on a clock and then put another slit in between each one of those slits. See picture 2 and 3 below. You also need to make a small hole in the centre of the circle.
- Choose what colour threads you want to use (you need 7 threads in total but could use just 3 colours and use 2 or strands of each colour)
- Next measure and cut 7 strands of thread to about 55cm long and thread them through the centre of the circle and tie a knot. You need to leave about 6cms on the short side as you will need some excess to be able to tie them on. The side with the short lengths of thread is the back. See picture 4.
- Now take one of the long threads and place into one of the slits on the outside of the circle and continue to do this with the other 6 strands of thread. You should have one piece of thread in each slit and one slit spare. See picture 6.
The next bit is quite tricky to explain so I added some more pictures, this time with the slits numbered and each piece of thread is a different colour.
As you can see from the pictures below, slit number one is empty. Working in a clockwise direction, you want to take the thread in slit 6, which is 3 slits before the empty one and move it to the empty one, jumping over two slits (7 and 8)
This now leaves slit 6 empty (picture 2 below), now you are going to move the thread from slit 3 to slit 6, jumping over 4 and 5.
You will keep working round and round the same way, jumping over two slits each time. You will also need to pull the knotted side of the thread so it doesn’t come through the hole.
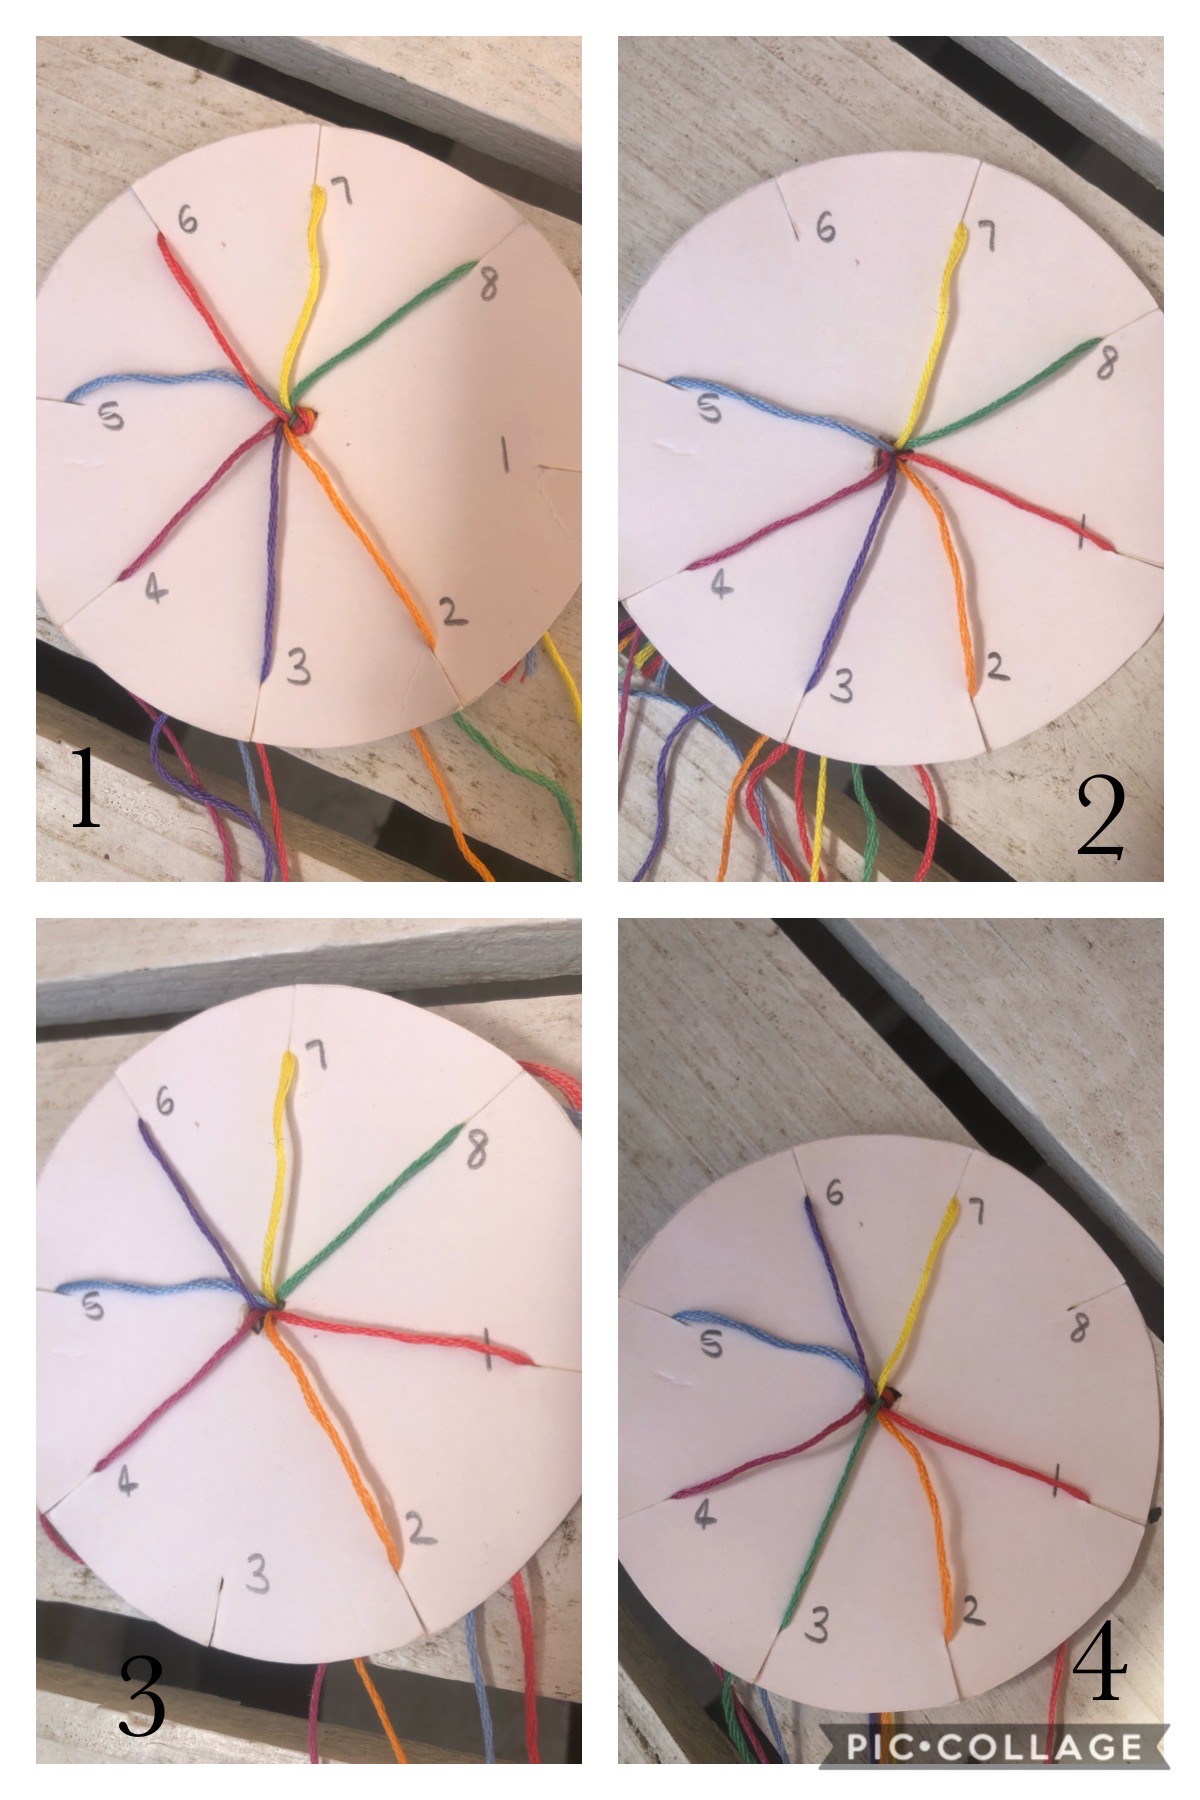
Gradually the friendship bracelet will start to grow, which you will be able to see if you turn the disk over.
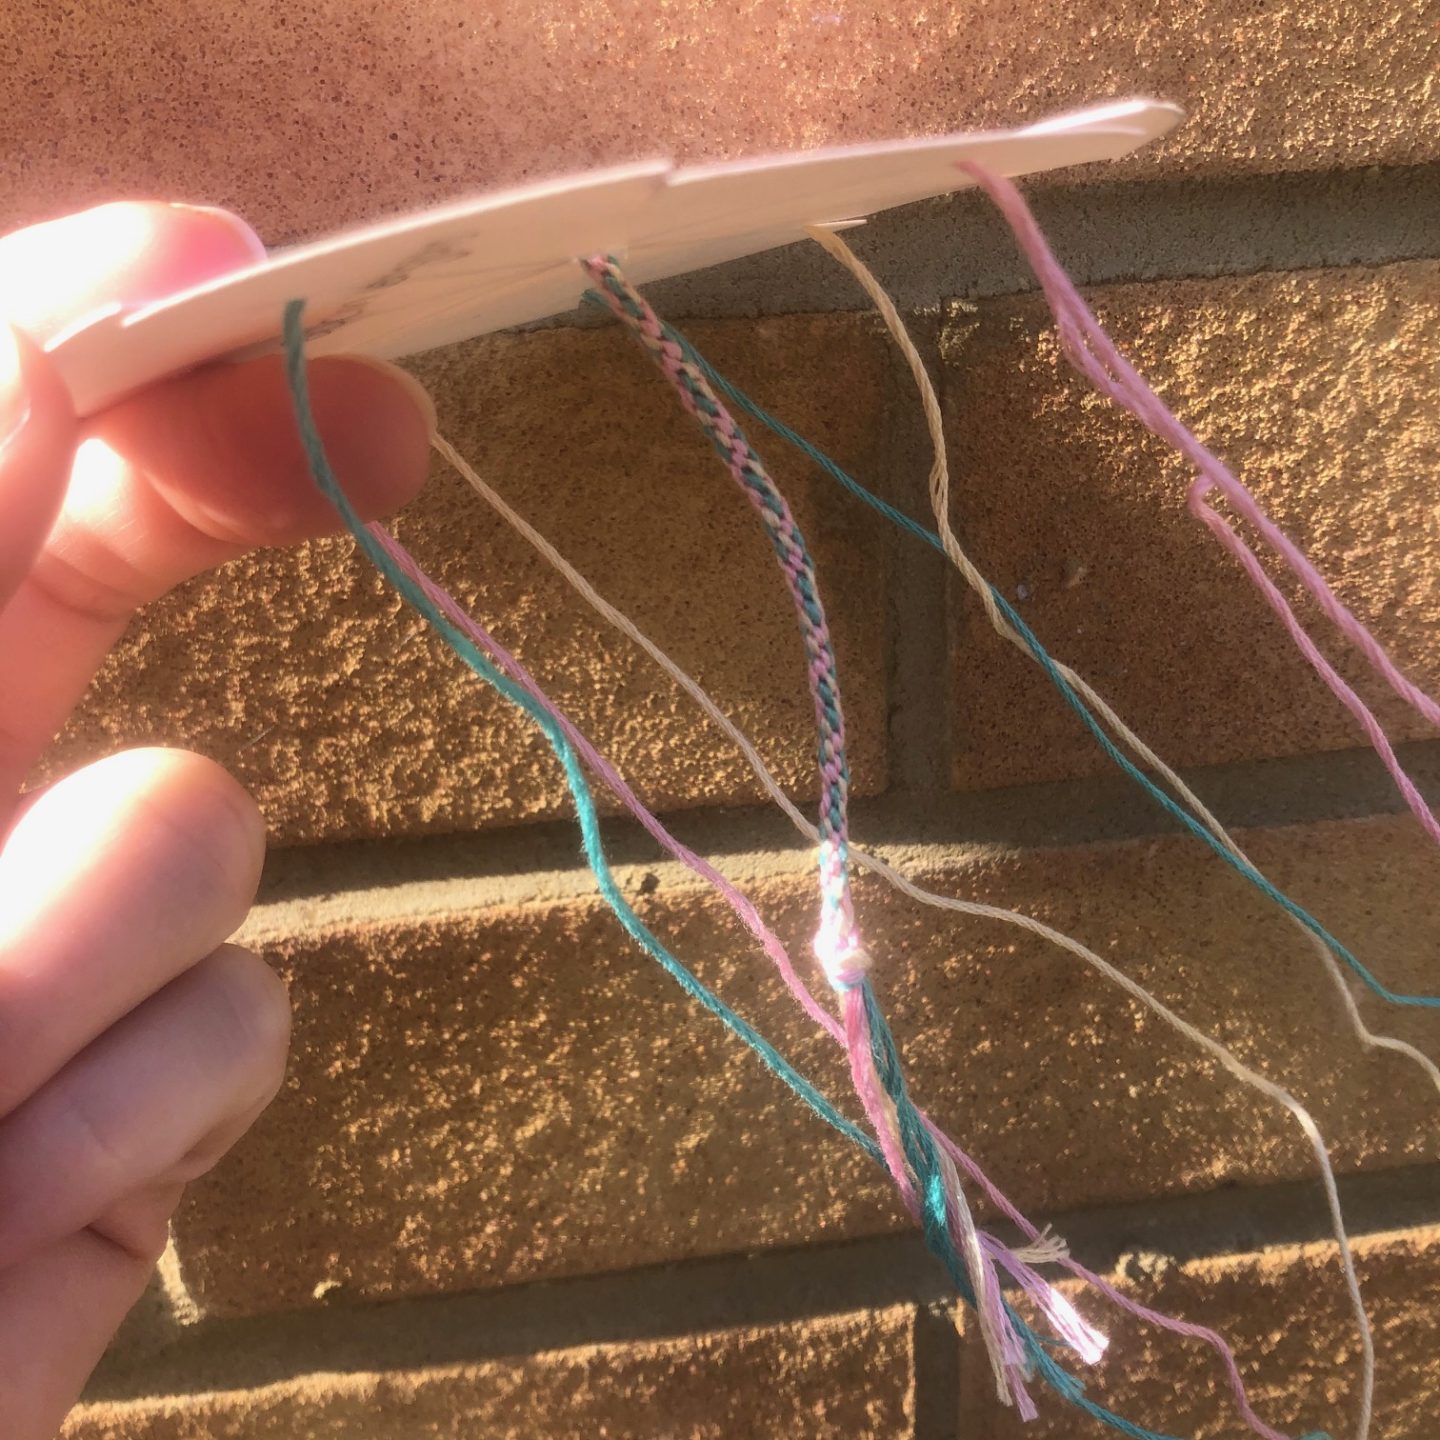
Just keep going until its the right length to fit around your wrist or ankle. We have made some for our ankles and some for our wrists. When you reach the desired length, take the threads out of the slits and tie a knot. You can then tie them onto your wrist or ankle and trim the ends.
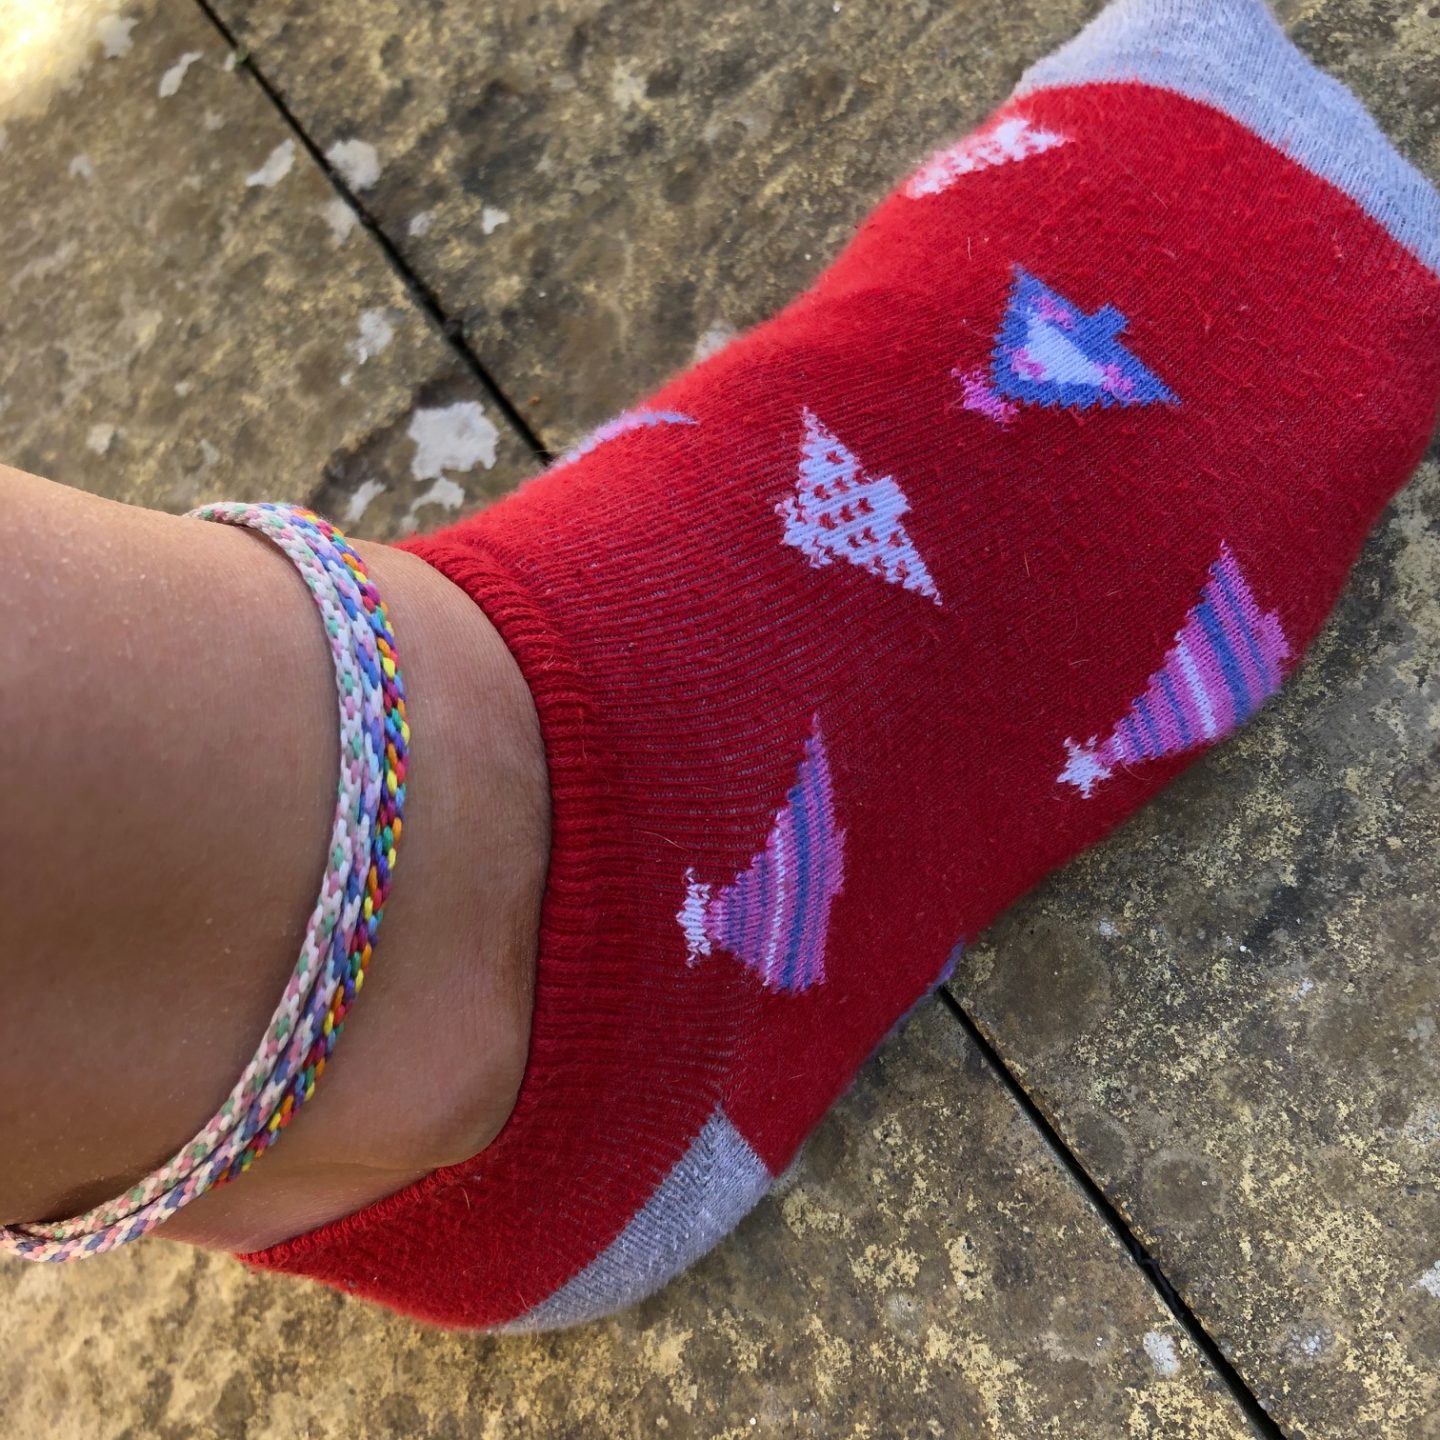
Yes, I do have Christmas socks on in April!!
As I said before these are very addictive to make, we have been sitting out in the garden making them or in front of the TV. They are also easy to put down and just pick up as and when you want too or have a few different colour combinations going at the same time. And what a lovely gift to be able to give your friends and family – after lockdown!
I would love to see all your friendship bracelets, so please tag me on instagram.
Amy